When surgical masks are not available, a homemade mask (like a bandanna) may offer some protection.
Homemade masks can be used by sick people to help prevent spreading the virus to other people, by reducing the amount of the sick person’s droplets that get into the air.
Note that wearing a face mask is not very effective at preventing the wearer from getting infected, as the mask may give a person a false sense of security and will likely increase the number of times a person will touch their own face (e.g., to adjust the mask).
Additionally, any mask, no matter how efficient at filtration or how good the seal, will have minimal effect if it is not used together with other preventative measures, such as frequent handwashing and physical distancing.
Below we have included instructions for making your own DIY face mask.
This is NOT a substitute for N95 respirators / masks
Cloth masks offer some protection and only can work to reduce your chances of getting sick. DIY cloth masks are a fun and inexpensive way to help protect yourself – in conjunction with other precautions – to slow down the spread of COVID-19.
Here is a step-by-step guide to making your own reversible and reusable cloth masks. They are machine-washable and have no creative boundaries, so be as creative as you’d like – we certainly have the time!
CLICK HERE if you would like to download a full-size printable version of the instructions.
Instructions
You will need:
- The recommended fabric for these face masks is light-weight cotton – it is the easiest fabric to sew and is the recommended fabric for these specific masks. (TIP: if you do not have fabric laying around, an old cotton T-shirt works as well!
- Elastic – 4 pieces (TIP: If you do not have elastic, string is an option. If you have no string, you can make ties from fabric)
- Scissors
- Paper Coffee Filter (optional)
TIP: Click on the images below to enlarge
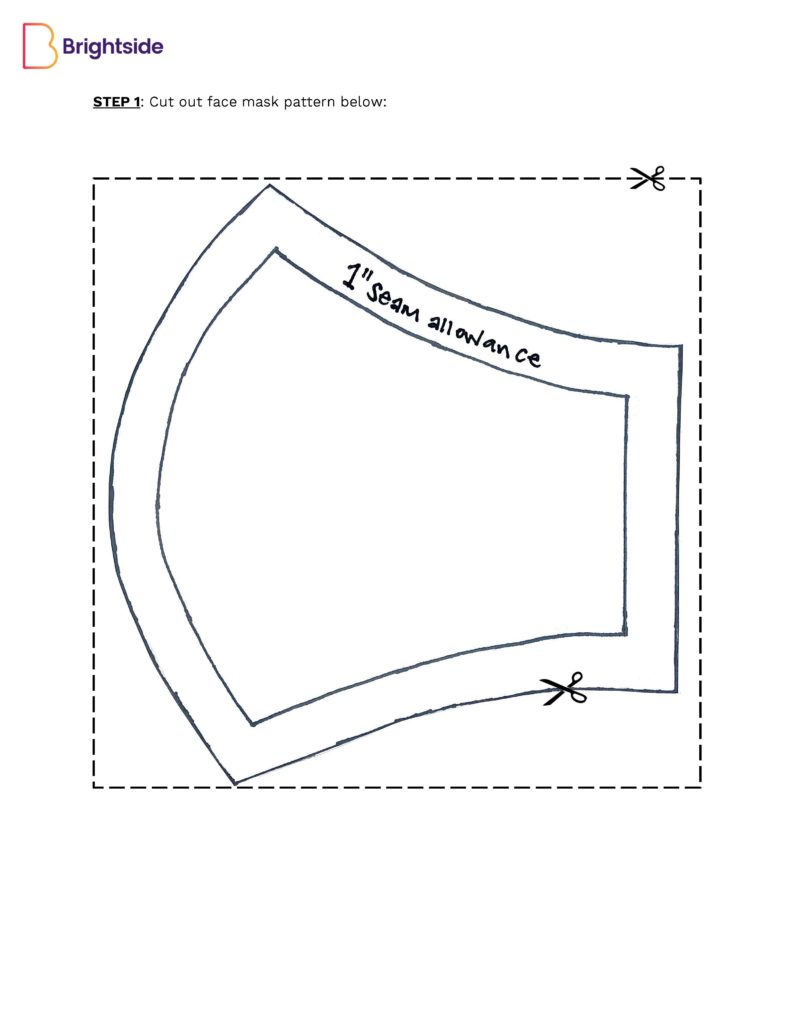
Step 1
Cut out Mask Pattern – CLICK HERE for full-size, printable pattern
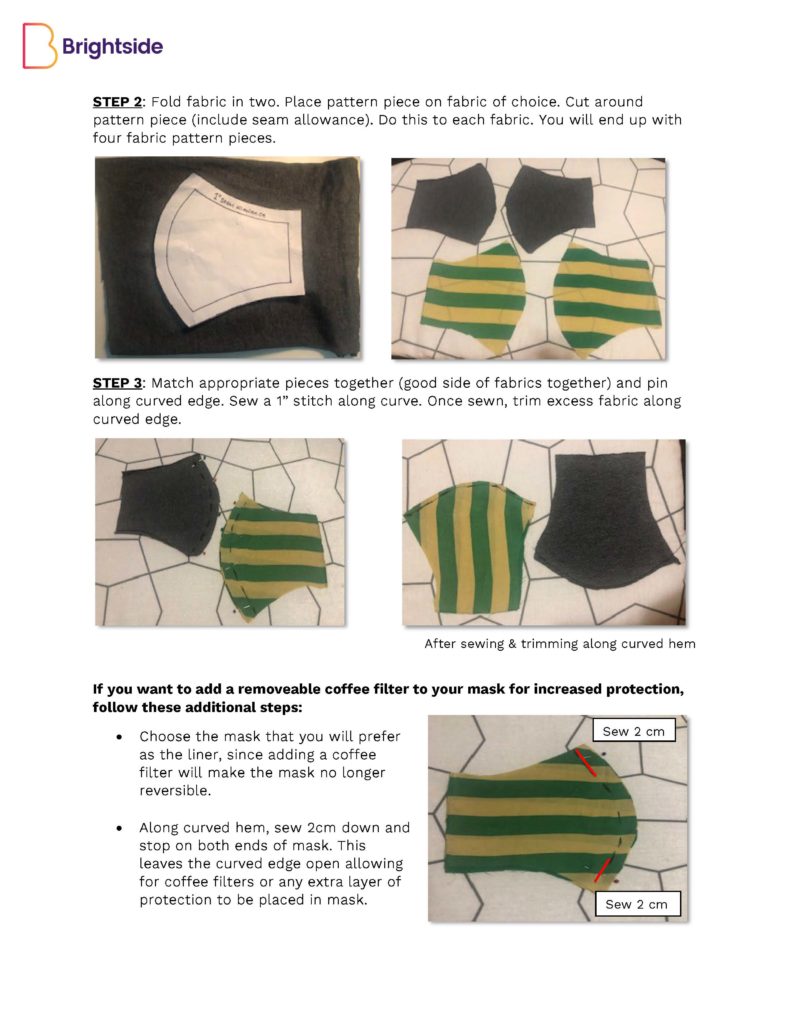
Step 2
Fold fabric in two. Place pattern piece on fabric of choice. Cut around
pattern piece (include seam allowance). Do this to each fabric. You will end up with four fabric pattern pieces.
Step 3
Match appropriate pieces together (good side of fabrics together) and pin
along curved edge. Sew a 1” stitch along curve. Once sewn, trim excess fabric along curved edge.
If you want to add a removeable coffee filter to your mask for increased protection, follow these additional steps:
- Choose the mask that you will prefer as the liner, since adding a coffee filter will make the mask no longer reversible.
- Along curved hem, sew 2 cm down and stop on both ends of mask. This leaves the curved edge open allowing for coffee filters or any extra layer of protection to be placed in mask.
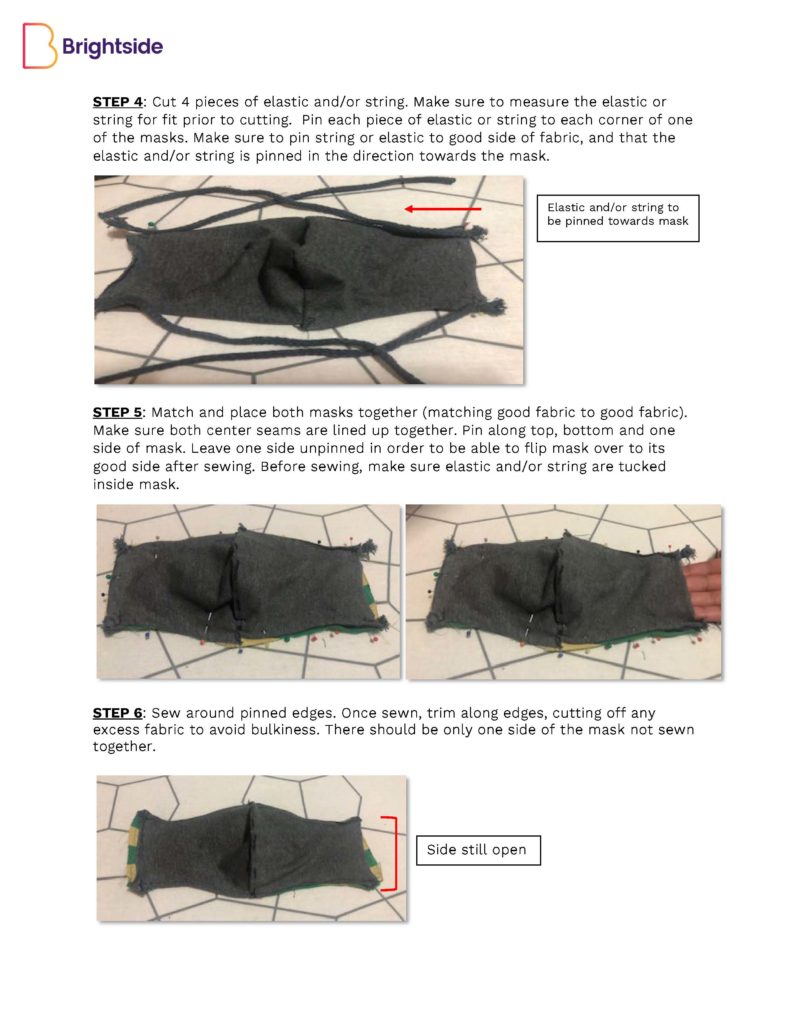
Step 4
Cut 4 pieces of elastic and/or string. Make sure to measure the elastic or string for fit prior to cutting. Pin each piece of elastic or string to each corner of one of the masks. Make sure to pin string or elastic to good side of fabric, and that the elastic and/or string is pinned in the direction towards the mask.
Step 5
Match and place both masks together (matching good fabric to good fabric). Make sure both center seams are lined up together. Pin along top, bottom and one side of mask. Leave one side unpinned in order to be able to flip mask over to its good side after sewing. Before sewing, make sure elastic and/or string are tucked inside mask.
Step 6
Sew around pinned edges. Once sewn, trim along edges, cutting off any excess fabric to avoid bulkiness. There should be only one side of the mask not sewn together.
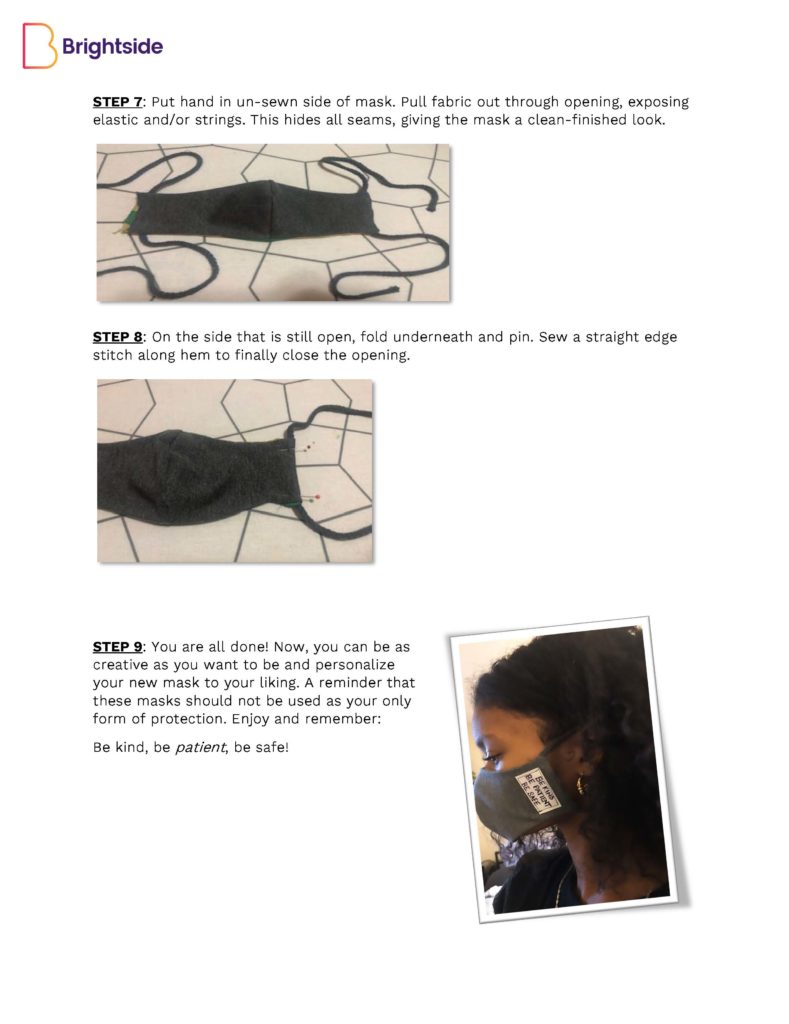
Step 7
Put hand in un-sewn side of mask. Pull fabric out through opening, exposing elastic and/or strings. This hides all seams, giving the mask a clean-finished look.
Step 8
On the side that is still open, fold underneath and pin. Sew a straight edge stitch along hem to finally close the opening.
You’re Done!
You are all done! Now, you can be as creative as you want to be and personalize your new mask to your liking. A reminder that these masks should not be used as your only form of protection.
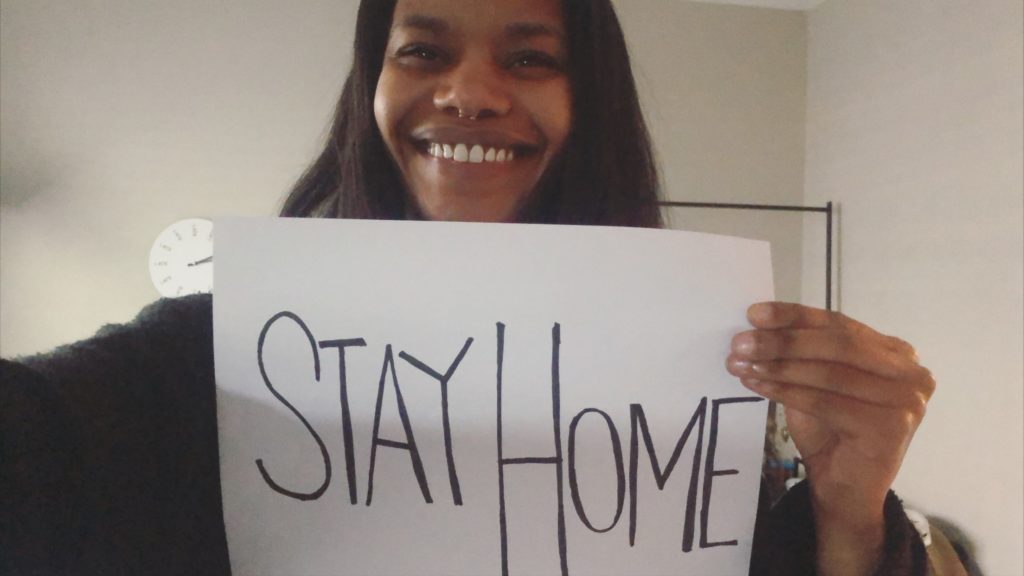
This DIY Face Mask comes courtesy of our Front Desk Coordinator, Chantel Paul. She is a talented clothing designer in her spare time, and has put together this simple, low-cost and easy to make face mask design for you to try at home.
